Welcome to the Wonderful, Messy World of Solids
There is nothing quite like the milestone of introducing your baby to real food. It is a milestone filled with pure excitement, cameras at the ready, and, let’s be entirely honest, a glorious amount of absolute mess. Watching your little one experience a new flavor for the very first time, complete with those hilarious, confused facial expressions is one of the sweetest chapters of early parenthood.
But alongside that excitement, it is completely normal to feel a sudden wave of overwhelm. You open up social media and see elaborate, multi-step baby culinary creations, or you stroll down the grocery aisle and see endless rows of expensive pouches and specialized baby-food-making gadgets. It’s easy to think, “Do I really have time for this? Do I need to buy a whole new appliance just to mash a carrot?”
Take a deep breath. The short answer is a resounding no. Making healthy, delicious food for your baby does not mean spending your precious, limited free time chained to the kitchen, nor does it require a single piece of pricey, single-use equipment. If you have a standard fork, a basic blender, and an ordinary ice cube tray, you already have everything you need to be a baby food rockstar.
The Philosophy: Connection, Simplification, and Whole Foods
Our philosophy here is simple: Keep it stress-free, keep it whole-food-focused, and prioritize connection over perfection.
Introducing solids isn’t about strict rules or managing a complicated kitchen production line. It is about opening up a world of natural flavors, vibrant colors, and rich nutrients for your growing baby. By focusing on simple, nutrient-dense whole foods, think ripe avocados, sweet potatoes, and fresh greens, you are building a beautiful foundation for a lifetime of healthy eating.
More importantly, this stage should be about sharing a positive experience with your child. When you strip away the stress of complex meal prep, you free up the mental space to focus on what truly matters: co-regulating with your baby, celebrating their curiosity, and keeping mealtime a calm, joyful space for exploration.
The Value Proposition: What’s In Store For You
You are busy enough as it is, which is why this guide is designed to be the ultimate shortcut to confident baby food prep. We aren’t interested in making things complicated. Instead, this post is your practical, low-prep roadmap to navigating the early days of solids with absolute ease.
Here is exactly what we are breaking down today:
-
Ultra-Simple Stage 1 & 2 Recipes: Quick, wholesome, and delicious flavor combinations that take minutes to prepare (including brilliant no-cook options).
-
The Ultimate Batch-Cooking Hack: How to use your freezer to prepare weeks of nutrient-dense meals in a single, effortless afternoon block.
-
Safe Storage & Thawing Guidelines: The exact timelines and methods to ensure your homemade purees stay fresh, safe, and packed with vitamins.

You don’t need to be a chef to give your baby the absolute best start with food. Let’s dive into how easy, minimal-prep, and genuinely fun making homemade baby food can truly be.
The Low-Prep Essentials
Before you steam your first veggie or mash your first fruit, let’s talk about how to set yourself up for absolute success. The secret to keeping homemade baby food stress-free is all in the preparation or rather, realizing just how little preparation you actually need to do. You don’t need a pristine, perfectly organized kitchen or an afternoon completely free of interruptions. You just need a few basic insights and a minimalist toolkit to get the ball rolling.
Knowing When Your Baby is Ready
It can be tempting to circle a date on the calendar the moment your baby hits the four- or six-month mark, but every single child develops on their own unique timeline. Instead of watching the clock, watch your baby. My Muna started solid foods late, as at 6 months, i noticed he wasn’t ready, he easily throws up, it was always a tug of war during mealtime, whether you were introducing a new thing or trying it a second time but Eze gave me a different mealtime story as a mother. As early as 4month Eze could follow the movement of my hand while carrying him on my laps and eating.
The transition to solid foods is safest and most enjoyable when your little one shows true developmental readiness. Here are the key signs to look out for:
-
Strong Head and Neck Control: Your baby should be able to sit relatively upright in a highchair with little to no support, holding their head steady.
-
The Disappearing Tongue-Thrust Reflex: If you place a tiny bit of food on their tongue and they instantly push it right back out with their tongue, they aren’t quite ready to swallow solids yet. When this reflex fades, they will be able to move food to the back of their mouth.
-
Intense Curiosity: Are they watching your fork move from your plate to your mouth with laser focus? Are they reaching for your food or making chewing motions while you eat? That curiosity is a wonderful green light that their brain and body are eager to explore.

The Minimalist Toolkit: What You Actually Need
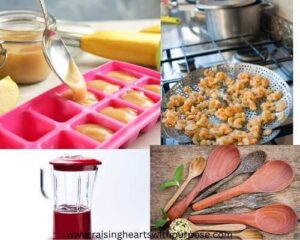
If you look at modern baby registries, you’ll find an endless array of specialized steamers, processors, and counter-top appliances dedicated entirely to baby food. While those can be lovely, they are entirely optional. A minimalist approach means fewer dishes to wash, less clutter on your counters, and zero guilt.
To make nutrient-dense, gorgeous purees at home, you only need a few everyday items you likely already own:
-
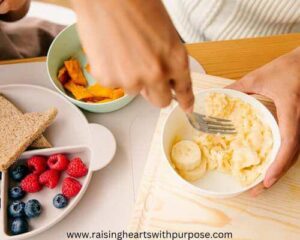
A Reliable Blending Tool: A standard kitchen blender, a food processor, or even a simple handheld immersion (stick) blender works beautifully. If you are doing ultra-soft foods like bananas or avocados, a sturdy metal fork is all it takes.
-
A Steaming Basket: A cheap metal or silicone steamer basket that fits inside your regular pots is perfect for softening up root vegetables and fruits while locking in all their vital nutrients.
-
Standard Silicone Ice Cube Trays: Forget expensive, single-use baby storage jars for the early days. Standard ice cube trays are the ultimate secret weapon. They hold roughly one ounce of food per cube, making it incredibly easy to freeze, portion, and mix-and-match meals later on.
-
A Few Flexible Spoons: Look for soft, silicone spoons that are gentle on tender, teething gums.
The Golden Rule of First Foods
When you are ready to serve that very first spoonful, there is one foundational guideline to keep in mind: introduce single-ingredient foods one at a time, waiting about three to five days before moving on to the next new food.
This slow and steady approach serves a very important purpose. If your baby happens to have a mild digestive reaction, a sudden diaper rash, or a food sensitivity, you will know exactly which food caused it. If you mix sweet potatoes, apples, and peas all together on day one and a reaction occurs, it’s impossible to pinpoint the culprit.
Starting simple keeps things safe, gives your baby’s digestive system time to adapt, and lets them fully experience and appreciate individual flavors before you start creating delicious culinary blends.
Stage 1: Simple, Single-Ingredient Purees (6+ Months)
Welcome to the starting line. When your baby is around six months old and showing all the signs of readiness, it’s time to introduce them to the wonderful world of flavor. At this stage, the goal isn’t for your baby to consume large quantities of food, remember, breastmilk or formula still provides the vast majority of their nutrition. Instead, Stage 1 is all about exploration, gentle texture transitions, and building a positive association with the highchair.
For these first tastes, we want to focus on smooth, silky textures that are easily digestible and naturally packed with nutrients. To keep your kitchen time entirely stress-free, we are leaning heavily into zero-cook options and simple, foolproof prep.
Here are three perfect, nutrient-dense starter recipes to launch your baby’s food journey.
1. The Perfect Avocado Puree

Avocado is often called nature’s perfect baby food, and for good reason. It is loaded with healthy monounsaturated fats, which are absolutely crucial for your baby’s rapid brain development. The absolute best part for a busy parent? It requires zero cooking, meaning you can whip up a fresh batch in under two minutes.
-
Ingredients: ½ ripe avocado, 1–2 tablespoons of breastmilk, formula, or warm water.
-
How to Choose: Look for an avocado that yields slightly to gentle pressure in the palm of your hand, but isn’t mushy, being mushy indicates getting bad.
-
The Low-Prep Method: Slice the avocado in half, remove the pit, and scoop the rich green flesh into a small bowl. Using the back of a sturdy fork, mash it thoroughly until it is completely smooth. Stir in a splash of breastmilk or formula to thin it out to a runny, easily swallowable consistency for those very first spoonfuls.
-
Serving Tip: Because avocados oxidize and turn brown quickly when exposed to air, this recipe is best made fresh right before serving rather than frozen.
2. Creamy Banana & Breastmilk Puree
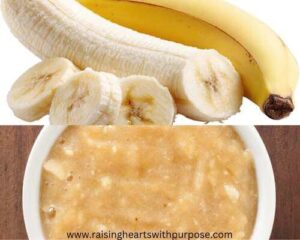
Bananas are a classic first food because they are naturally sweet, incredibly gentle on tiny, developing tummies, and rich in potassium and vitamin B6. Much like the avocado, this is a fantastic fast food option for busy mornings when you want a nutritious meal with absolutely minimal cleanup.
-
Ingredients: ½ small, ripe banana (look for one with a few brown spots on the peel, as these are sweeter and easier to digest), 1 tablespoon of breastmilk or formula.
-
The Low-Prep Method: Peel the banana and slice it into a few chunks. Toss it into your blender or simply use your fork to mash it inside a small bowl. Blend or mash vigorously until there are absolutely no lumps remaining. Add your liquid of choice to achieve a smooth, velvety texture.
-
Serving Tip: Bananas can occasionally cause mild constipation in some babies if introduced in large amounts. Pairing this creamy puree with a little extra breastmilk or formula helps keep things moving smoothly.
3. Velvety Sweet Potato Puree
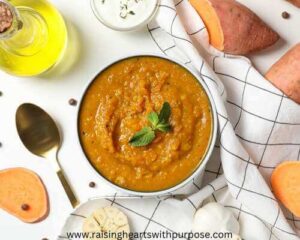
If you want to try a warm, comforting root vegetable, sweet potato is an absolute winner. It is packed with beta-carotene which the body converts to Vitamin A for eye and immune health, naturally sweet, and creates an incredibly smooth, luxurious texture when pureed. This is also a phenomenal option for batch-cooking and freezing.
-
Ingredients: 1 medium sweet potato, water for steaming (plus a little reserved cooking water or breastmilk for blending).
-
The Low-Prep Method: Scrub the sweet potato, peel it, and dice it into small, uniform cubes about ½-inch thick so they cook quickly. Place the cubes into your steamer basket over a pot of boiling water. Cover and steam for roughly 10 to 12 minutes, or until the cubes are completely tender and slide right off a fork.
-
The Blend: Transfer the cooked sweet potato to your blender or food processor. Add a few tablespoons of the leftover steaming water, formula, or breastmilk. Blend on high until it forms a gorgeous, silky-smooth orange puree. Let it cool completely to a safe, lukewarm temperature before serving.
Stage 2: Flavor Combos & Texture Building (7–9 Months)
Once your baby has mastered single-ingredient purees and has been safely exposed to individual flavors, it’s time for the real fun to begin. Between seven and nine months, your baby’s digestive system is more mature, their oral motor skills are developing, and they are ready to explore a wider culinary landscape.
Stage 2 is all about building confidence through variety. Instead of perfectly smooth, liquid-like purees, you can begin to offer slightly thicker textures, fine mashes, and small, soft lumps to help them practice chewing. It is also the ideal window to introduce mild herbs and warm spices, helping to expand their palate and prevent picky eating habits down the road.
Here are three nutrient-dense, flavorful flavor combinations that are incredibly easy to prep and loaded with vital vitamins and proteins.
1. The Green Goddess Blend (Peas, Spinach, & Pear)
It can sometimes be a struggle to get vibrant greens into a little one’s diet, but the secret lies in balance. This beautiful, bright-green blend combines iron-rich spinach and protein-packed green peas with the natural, juicy sweetness of ripe pears. The pear perfectly cuts through any bitterness from the greens, making it an absolute hit with babies.
-
Ingredients: 1 ripe pear (peeled, cored, and diced), ½ cup frozen green peas, 1 packed cup of fresh organic baby spinach.
-
The Low-Prep Method: Place your diced pear and frozen peas into your steamer basket. Steam for about 5 to 7 minutes until the pear chunks are completely tender. Right before you turn off the heat, toss the fresh spinach directly on top of the peas and pears, cover with the lid, and let it wilt in the steam for just 60 seconds.
-
The Blend: Transfer everything into your blender. Because pears are naturally very juicy, you likely won’t need to add much extra liquid. Pulse until you reach a slightly textured, thick puree.
2. Apple & Cinnamon Comfort Oats
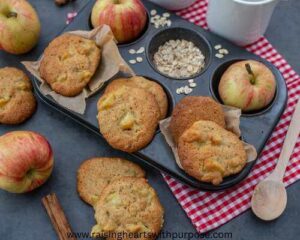
Introducing grains is a wonderful way to give your baby long-lasting energy, and pairing them with a warm, aromatic spice like cinnamon makes the kitchen smell incredible. This recipe utilizes rolled oats which are rich in fiber and essential minerals and pairs them with iron-fortified baby oatmeal or finely ground oats for a comforting, thick breakfast texture.
-
Ingredients: 1 sweet apple (like Gala or Fuji, peeled, cored, and chopped), ¼ cup rolled oats (finely ground in a blender beforehand, or standard baby oatmeal), a tiny pinch of ground cinnamon, ¾ cup water or breastmilk/formula.
-
The Low-Prep Method: In a small saucepan, bring the chopped apples, ground oats, water, and that tiny pinch of cinnamon to a gentle boil. Reduce the heat to low, cover, and let it simmer for about 8 to 10 minutes, stirring occasionally, until the apples are completely soft and the oats have absorbed the liquid.
-
The Blend: For a true Stage 2 texture, you can simply take a potato masher or a fork and mash the soft cooked apples directly into the oatmeal, leaving small, soft bits for your baby to experience. If your baby prefers things a bit smoother, flash-blend it for a few seconds.
3. Root Veggie & Chicken Mash
As your baby approaches the 8- to 9-month mark, their natural iron stores (which they were born with) begin to deplete, making high-quality, easily absorbed iron and protein top dietary priorities. Introducing poultry can feel intimidating to some parents, but cooking it alongside naturally sweet root vegetables keeps the meat incredibly moist, tender, and easy to digest.
-
Ingredients: ¼ cup cooked, skinless pasture-raised chicken breast (finely minced or shredded), ½ cup sweet potato or butternut squash (peeled and diced), 2 tablespoons of low-sodium, organic bone broth or breastmilk.
-
The Low-Prep Method: Steam your diced root vegetable of choice until it is completely fork-tender (about 10–12 minutes). While it steams, ensure your chicken is fully cooked and finely shredded.
-
The Blend: Place the warm, steamed veggie cubes and the shredded chicken into your food processor or blender. Pour in your bone broth or breastmilk. Pulse the mixture intentionally so that it breaks down into a thick, hearty, and finely minced mash rather than a completely liquified soup. This gives your baby a wonderful opportunity to practice moving more substantial textures around their mouth safely.
The Batch-Cooking & Storage Survival Guide
Now that you have a handful of delicious, nutrient-dense recipes in your toolkit, let’s talk strategy. The absolute best way to keep making your own baby food stress-free is to cook in batches. You do not want to be pulling out the blender or chopping vegetables three times a day while managing a hungry little one. Instead, you can spend just one hour on a Sunday afternoon prepping a massive variety of meals that will last you for weeks.
Here is exactly how to store, freeze, and safely thaw your homemade creations like a pro, keeping kitchen time to an absolute minimum.
The Ice Cube Tray Hack: Perfect Portions Every Time
If you buy nothing else for this stage, grab a couple of standard silicone ice cube trays. They are the ultimate secret weapon for efficient baby food storage.
-
Step 1: Spoon and Fill. Once you have blended your sweet potatoes, green goddess blend, or oat mixtures, let them cool slightly. Spoon the purees directly into the compartments of your ice cube tray. A standard ice cube slot holds exactly one ounce of food. This is incredibly helpful for tracking how much your baby is eating!
-
Step 2: Flash Freeze. Place the filled trays flat in your freezer for about 4 to 6 hours, or until the cubes are frozen completely solid.
-
Step 3: Pop and Store. Once solid, pop the purees out of the trays and transfer them into large, freezer-safe silicone bags or zip-top bags. Label the bag with the name of the food and the date you made it.
This method frees up your trays for the next batch and leaves you with a freezer stocked with colorful, individual flavor cubes. When mealtime rolls around, you can grab exactly what you need, perhaps one cube of pear puree and one cube of spinach and mix them together for a completely custom meal.
How Long Does It Stay Fresh?
To keep your baby’s food perfectly safe and packed with nutrients, stick to these simple timelines:
-
In the Fridge: Freshly made purees can be kept in an airtight container in the refrigerator for up to 3 days. If your baby doesn’t finish a portion within that window, toss it out.
-
In the Freezer: Frozen puree cubes maintain excellent quality and nutritional value for up to 3 months.
Safety Note: Never feed your baby directly out of the main storage container if you plan to save the leftovers. The bacteria from your baby’s saliva will transfer from the spoon into the food, causing it to spoil much faster. Always spoon a small portion into a separate bowl for serving.
Thawing and Warming Safely
When it’s time to serve, you have a few easy, low-prep options to safely thaw your frozen cubes:
-
The Overnight Method (Recommended): Place the desired number of cubes into a small, covered dish and let them thaw in the refrigerator overnight. By morning, they’ll be ready to go.
-
The Quick Warm Water Bath: If you need a meal right away, place the frozen cubes into a small glass bowl. Set that bowl inside a larger bowl filled with hot water. Stir the food occasionally until it is fully thawed and warmed through.
-
The Stovetop: Place the cubes into a small saucepan over low heat, stirring constantly so it doesn’t scorch, until it liquefies and warms up.
A quick word on temperatures: Always test the food on the inside of your wrist before offering it to your baby. It should feel lukewarm or cool, never hot. If you use a microwave to thaw your purees, stir the food vigorously and let it sit for a minute to eliminate any hidden hot spots that could accidentally burn your baby’s mouth.
Encouragement
As you step into this beautiful, messy, exciting world of solid foods, take a moment to give yourself a lot of credit. You are doing a wonderful job. It is incredibly easy to get caught up in the comparison game or to worry that you aren’t doing enough, but your baby doesn’t need perfection. They just need you. I once used to think like that, that maybe am not doing enough for my baby that is why he is not well. But i understand better now.
Connection Over Perfection
Some days, your baby will happily gobble down three ounces of homemade sweet potato mash, and you will feel like an absolute culinary genius. Other days, they will take one look at the spoon, smack it out of your hand, and end up with more avocado in their hair than in their tummy.
That is completely normal.
At this stage, success isn’t measured by a clean bowl. Success is simply positive exposure. Every time you offer your child a new color, a new aroma, or a new texture, you are teaching their brain and body about the world around them. Keep mealtime calm, keep your expectations flexible, and focus on co-regulating and connecting with your little one across the highchair tray.
You don’t need a complicated routine, hours of free time, or fancy kitchen gadgets to give your child a nutrient-dense, whole-food start to life. With a few simple ingredients, a trusty fork, and your freezer trays, you have everything you need to make this transition simple, joyful, and completely stress-free.
Now, take a deep breath, embrace the inevitable splatters, and have fun watching your little explorer take their very first bites.
Also look up for one of our series tagged Baby breakfast Ideas