The 4th of July with a baby or toddler can feel a little overwhelming between the heat, the disrupted nap schedules, and the sensory overload of fireworks. Shifting the focus to low-prep, process-over-perfection activities lets you create sweet holiday memories without adding to your mental load.
Ah, the 4th of July. If you scroll through social media right now, your feed is likely flooded with images of toddlers in perfectly coordinated smocked outfits, families smiling effortlessly at crowded community parades, and pristine, layered red-white-and-blue desserts that look like they took three hours to bake.
It’s enough to make any mom feel a wave of holiday pressure. You find yourself thinking, Should I be packing up the heavy stroller, a giant diaper bag, and three cooling towels to fight the 90-degree heat at our local festival? Should we stay up until 10:00 PM so my toddler can see the fireworks, even though a late bedtime usually triggers a 3-day nap strike?
Let’s pause, take a deep breath, and lower the bar completely.
Here is the beautiful truth: your baby or toddler doesn’t care about a three-hour parade. They don’t need booming, late-night fireworks (which, let’s be honest, usually just scare them anyway) to have a magical holiday. To a tiny human, a perfect holiday isn’t about giant, exhausting spectacles, it’s just about having fun, exploring new textures, and spending connected, unhurried time with you.
This year, we are trading holiday chaos for pure simplicity.
In this post, I’m sharing 9 entirely stress-free, low-prep 4th of July activities designed specifically for babies and toddlers. Every single one of these ideas uses items you likely already have in your pantry, your toy chest, or your backyard. There are no complicated instructions, no expensive craft kits, and absolutely no pressure for things to look picture-perfect.
Grab an iced coffee, ditch the guilt, and let’s dive into some easy, memory-making fun you can do right from the comfort of your own home (and right next to your air conditioner).
3 Safe & Simple Sensory Ideas
Activity 1: The Mess-Free Highchair Flag Paint
If the thought of opening bottles of red and blue paint near your baby or toddler makes your blood pressure spike, this activity is for you. We love sensory play, but we don’t always love scrubbing washable paint out of tiny fingernails or off the living room walls while managing a fussy afternoon slump.
This mess-free flag painting is the ultimate high-chair hack. It gives your little one all the rich sensory benefits of squishing, smearing, and blending colors, with absolutely zero cleanup for you.
The Low-Prep Trick
Instead of letting tiny hands dive directly into open paint, we are trapping the paint beneath a protective layer of plastic cling wrap. Your baby gets to manipulate the texture and see the colors move, but the paint stays entirely contained.
What You Need:
-
A sheet of sturdy white paper or cardstock (cut down to fit your highchair tray)
-
Red and blue washable kids’ paint
-
A roll of plastic cling wrap
-
Painter’s tape or masking tape
How to Set It Up (In Under 2 Minutes):
-
Prep the Paper: Place your white paper flat on the highchair tray.
-
Add the Paint: Squeeze a few generous dollops of red and blue paint directly onto the paper. You can arrange them roughly in lines to mimic a flag pattern, or just alternate dots across the page.
-
Seal It Up: Pull a piece of plastic cling wrap completely over the paper and the paint. Make sure it extends past the edges of the paper.
-
Tape It Securely: Use your painter’s tape to tape down all four sides of the plastic wrap directly to the highchair tray. Double-check that the edges are tightly sealed so no rogue paint escapes when tiny fingers start pressing down.
Connection Over Correction: How to Play
Once it’s secured, let your little one go to town. Show them how to press their fingers, palms, or even a favorite plastic toy onto the plastic wrap. They will love watching the red and blue paint squish together, creating entirely new swirls of purple.
Don’t worry if it doesn’t look like a flawless American flag at the end. The magic of process art is that the joy is entirely in the doing, not the final result. Your baby is developing fine motor skills, hand strength, and visual tracking all while sitting safely in their chair while you sip a hot cup of coffee or prep lunch.
Mom Tip: When they are done playing, simply peel up the tape, carefully lift the plastic wrap, and let the painting dry. You’ve got a sweet, abstract 4th of July keepsake, and your baby’s hands are completely clean.
Activity 2: Patriotic Pom-Pom Splash Bin
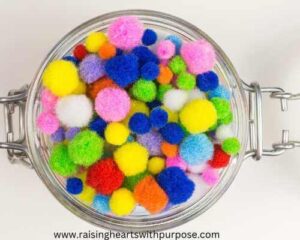
When the July heat hits, water play is always the easiest way to reset a cranky toddler. But if you don’t feel like packing up for a public pool or dealing with the chaos of a giant splash pad, this patriotic pom-pom splash bin is the perfect backyard or balcony alternative.
It takes less than three minutes to pull together, keeps little ones cool, and introduces a fascinating texture that toddlers absolutely love exploring.
The Low-Prep Trick
We are combining standard water play with everyday crafting pom-poms. If you’ve never put pom-poms in water before, it completely transforms them. They absorb the water like little sponges, becoming heavy, squishy, and incredibly satisfying for tiny hands to squeeze.
What You Need:
-
A shallow plastic storage container (like an under-bed storage tub or a dishpan)
-
A handful of red, white, and blue craft pom-poms (larger sizes work best for babies and toddlers)
-
A plastic slotted spoon, ladle, or measuring cups
-
A couple of plastic bowls or an empty muffin tin
How to Set It Up:
-
Fill the Bin: Pour a shallow layer of lukewarm water into your plastic container just a couple of inches is plenty.
-
Toss in the Festivities: Dump the red, white, and blue pom-poms directly into the water. Watch them float right on top.
-
Add the Tools: Drop a plastic slotted spoon and a cup or two right into the bin.
-
Contain the Splashes: If you are doing this indoors, simply lay down a couple of large bath towels underneath the bin to catch any rogue splashes. Otherwise, take it right out to the grass or patio.
Connection Over Correction: How to Play
Let your child lead the way. Younger babies will love simply reaching in, grabbing a wet pom-pom, and squeezing the water out between their fingers, which is fantastic for strengthening those little hand muscles.
For older toddlers, you can turn this into a casual scooping and sorting game. Show them how to use the slotted spoon to fish for the red or blue pom-poms and transfer them into a separate cup. They will quickly notice the difference between a dry, fluffy pom-pom and a heavy, wet one.
A Quick Note on Pom-Poms: Yes, craft pom-poms can absolutely get wet. When play-time is over, just squeeze the excess water out of them and lay them flat on a towel in the sun. They will dry out completely and return to their normal, fluffy state, ready to be used again for your next craft day.
(As with any water play, please stay within arm’s reach and supervise your little one closely while they explore their splash bin.)
Activity 3: Quick Firecracker Edible Sensory Bin
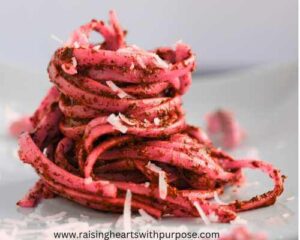
If you have a younger toddler or a baby who is currently in the everything goes straight into the mouth stage, standard sensory bins filled with water beads or dyed rice can feel way too stressful. You spend the entire time playing defense, prying things out of their tiny jaw, which completely defeats the purpose of a relaxing activity.
Enter the Firecracker Edible Sensory Bin. By using cooked spaghetti, you get a wonderfully vibrant, wiggly, and explosive texture that is 100% safe if your little one decides to sneak a midday snack.
The Low-Prep Trick
We are using a box of cheap pantry spaghetti and a quick splash of food coloring to create bright, festive firecracker strands. It looks incredibly exciting to a toddler, but it takes almost no effort on your part to prep while you’re already in the kitchen making lunch.
What You Need:
-
1 box of standard spaghetti pasta
-
Red and blue food coloring
-
A splash of vegetable oil or olive oil
-
A large plastic bin or a baking sheet
-
Optional: A few toddler-safe kitchen tools like plastic tongs, safety scissors, or bowls
How to Set It Up:
-
Cook the Pasta: Boil the spaghetti according to the box instructions. Drain it and rinse it thoroughly with cold water to stop the cooking and remove the excess starch.
-
Color the Strands: Divide the cooked pasta into two separate bowls (or gallon-sized zip-top bags). Add a generous squirt of red food coloring to one, and blue food coloring to the other. Toss or shake until the strands are brightly coated.
-
Set the Color & Add Shine: Let the pasta sit for about 5 minutes so the dye absorbs. Then, give it one more quick rinse under cold water to wash away any loose dye (this prevents it from staining tiny hands).
-
The Secret Step: Toss the colored pasta with a tiny splash of oil. This keeps the strands from sticking together into a giant clump and gives them a fun, glossy, slippery texture.
-
Assemble: Dump the red and blue pasta into your sensory bin, leaving a few plain white strands in the middle for a true red, white, and blue firecracker burst.
Connection Over Correction: How to Play
Plop your little one right down next to the bin and let them explore. Babies will love the slippery, cold sensation of gripping the noodles, pulling them apart, and feeling them wiggle through their toes if you let them sit right inside a clean bin.
For older toddlers, add a pair of plastic tongs or child-safe loop scissors. They will happily spend twenty minutes trying to lift, snip, and sort the firecracker strands into different bowls.
Mom Tip: If the idea of cleaning up sticky noodles off the floor sounds less than stress-free, take this bin straight into the empty bathtub or onto a grassy spot in the backyard. When they are done playing, you can just rinse the tub (or your toddler) off with the showerhead, or let the backyard birds enjoy any stray noodles left in the grass.
3 Easy Process Art Crafts (No Perfection Required)
Activity 4: Toilet Paper Roll Firework Stamps

When it comes to holiday crafts with toddlers, it is so easy to fall into the trap of wanting a perfect, Pinterest-worthy end product. But forcing a two-year-old to place stickers exactly where they belong or trying to paint a perfect flag usually ends in frustration for both of you.
Instead, we love focusing on process art, activities where the entire goal is just to enjoy the process of creating, experimenting, and making a mess. These toilet paper roll firework stamps are the perfect example. It gives your toddler total control over their creation, uses items from your recycling bin, and results in a beautiful, abstract piece of art that actually looks like a night sky full of fireworks.
The Low-Prep Trick
Instead of buying expensive stamps or stencils, we are upcycling empty cardboard toilet paper rolls (or paper towel rolls cut in half). By snipping the ends into a fringe, you create an instant, easy-to-grip stamp that naturally mimics the bursting shape of a firework.
What You Need:
-
2 or 3 empty toilet paper rolls
-
Child-safe scissors
-
Red, white, and blue washable kids’ paint
-
Dark colored paper (black, navy blue, or dark grey construction paper works best to make the colors pop)
-
A paper plate or shallow tray (to hold the paint)
How to Set It Up:
-
Cut the Fringe: Take an empty toilet paper roll and use your scissors to cut straight slits about 1 to 2 inches up the bottom of the roll, leaving about half an inch of space between each cut.
-
Fan It Out: Gently bend the cut strips outward so they fan out completely like a starburst or a flower.
-
Pour the Paint: Squirt a generous puddle of red, white, and blue paint onto a paper plate, keeping the colors slightly separated or side-by-side so your toddler can dip into them easily.
-
Prep the Canvas: Tape a sheet of dark construction paper down to the table or highchair tray to keep it from sliding around while they stamp.
Connection Over Correction: How to Play
Show your little one how to grab the top of the toilet paper roll (the part that isn’t cut makes a perfect, chunky handle for small hands), dip the fanned-out end into the paint, and press it firmly onto the dark paper.
When they lift it up boom. An instant firework explosion on the page.
Let them layer the colors, smash the stamps down repeatedly, and twist the rolls around. If they end up just smearing the paint with their hands or dragging the cardboard across the page to make giant streaks of color, let them. To a toddler, those streaks are just as magical as a perfect stamp. They are learning about cause and effect, practicing their grip strength, and exploring color mixing right before your eyes.
Mom Tip: If you want to minimize the hand-washing afterward, you can wrap a small piece of painter’s tape around the top portion of the tube to give them an even more defined handle to hold onto, keeping their tiny fingers entirely out of the paint tray.
Activity 5: 3D Puffy Paint Fireworks
If your toddler is obsessed with interesting textures, this activity is going to be a massive hit. Traditional finger paint is fun, but standard washable paint dries completely flat. Puffy paint, on the other hand, dries with a raised, squishy, 3D texture that kids find absolutely fascinating to touch both while they are making it and long after it dries.
Don’t let the name fool you, homemade puffy paint sounds fancy, but it is one of the cheapest, easiest sensory recipes you can make in your kitchen.
The Low-Prep Trick
Instead of buying specialty craft supplies, you can make a brilliant, cloud-like puffy paint using just two everyday household staples: classic white foam shaving cream and standard white school glue. When mixed together in equal parts, they create a thick, fluffy paint that holds its shape on the paper, giving you instant 3D firework clouds.
What You Need:
-
Standard white foaming shaving cream (avoid the gel kind, you want the cheap, fluffy white foam)
-
White school glue (like Elmer’s)
-
Red and blue food coloring or washable paint drops
-
Small bowls or an empty muffin tin for mixing
-
Sturdy paper or cardboard (cardstock or a piece of an old Amazon box works best, as regular paper will sag under the weight of the paint)
-
Paintbrushes, cotton swabs, or just tiny fingers.
How to Set It Up:
-
Mix the Base: In a small bowl, mix equal parts shaving cream and school glue (for example, half a cup of shaving cream and half a cup of glue). Stir it gently with a spoon until it forms smooth, stiff peaks it should look exactly like festive marshmallow fluff.
-
Color It: Divide your fluffy mixture into two or three bowls. Add a few drops of red food coloring to one bowl and blue to another, leaving one bowl bright white. Gently fold the color in so you don’t pop all the tiny air bubbles that make it puffy.
-
Secure the Canvas: Tape your sturdy cardstock or cardboard directly to the table or a baking sheet so it stays put while your little artist works.
Connection Over Correction: How to Play
There is no wrong way to use puffy paint. Dollop a few spoonfuls onto the cardboard and let your toddler go to town. They can use a chunky paintbrush to swirl the colors around, or they can dive in with their hands.
Encourage them to make big, sweeping circles or high-contrast splats to look like fireworks bursting in the sky. Because the paint is so thick, it provides a unique tactile experience that standard paint simply can’t match.
As they paint, talk about how it feels: Is it soft? Is it squishy? Is it cold? This builds great descriptive language skills while they play.
Mom Tip: When their masterpiece is finished, set it aside in a safe spot to dry overnight. As the glue cures, it locks the shaving cream bubbles into place. By the next morning, the paint will be dry to the touch but will still look and feel wonderfully puffy and squishy. Your toddler will love running their fingers over their 3D fireworks all over again.
Activity 6: Sidewalk Chalk Sparklers
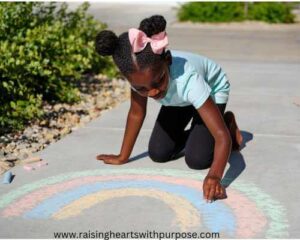
Real sparklers are a classic 4th of July tradition, but let’s be honest: handing a shooting stick of 1,200-degree fire to a fickle toddler or an unpredictable baby is a recipe for pure, unadulterated mom anxiety. You spend the entire two minutes panicked that they are going to drop it on their toes, touch the hot tip, or wave it too close to someone’s face.
This year, we are completely ditching the safety hazard and trading it for something just as magical, totally safe, and brilliantly low-prep: Sidewalk Chalk Sparklers.
The Low-Prep Trick
Instead of fire, we are using chunky sidewalk chalk to mimic the swirling, sparkling motion of real sparklers. It gets your little ones outside into the fresh air, lets them burn off some energy, and gives them that same sense of festive, evening motion, completely stress-free.
What You Need:
-
Chunky sidewalk chalk in red, white, and blue
-
A driveway, sidewalk, or concrete patio
-
Optional: A small spray bottle or a cup of water with a paintbrush
How to Set It Up:
There is literally zero setup for this one, mama. Just grab your bucket of chalk, open the back door, and head out to your driveway or patio.
Connection Over Correction: How to Play
To kick off the fun, show your toddler how to hold a piece of chalk and move their entire arm in big, looping circles, zig-zags, and explosive starburst lines on the concrete. Call them your giant driveway sparklers.
You can even model the sounds together, making Whoosh! and Sizzle! noises as you draw bright red and blue spirals on the ground. This big, sweeping movement isn’t just fun; it’s an excellent way for toddlers to develop their gross motor skills and shoulder stability, which eventually helps with writing down the road.
If you have a younger baby who isn’t quite drawing yet, sit them on the blanket next to you and let them explore the texture of the chalk sticks, or draw bright festive rings right around where they are sitting so they are enclosed in a colorful 4th of July bubble.
The Phase Two Low-Prep Trick: When your toddler starts to lose interest in drawing (usually after about 10 or 15 minutes), you can instantly double the lifespan of this activity by handing them a small spray bottle filled with water or a cup and a paintbrush.
Tell them to extinguish the sparklers. They will absolutely love spraying or painting water over their chalk lines, watching the vibrant red and blue pigments blend, liquefy, and wash away. It turns a simple drawing activity into a brand-new water sensory experience that buys you another 20 minutes of quiet sitting time.
3 Low-Key Ways to Celebrate at Home
Activity 7: The Living Room Parade

If you’ve ever tried to take a baby and a toddler to a traditional community 4th of July parade, you know it can quickly turn into a test of survival. Between fighting for a parking spot, standing on scorching hot asphalt, keeping tabs on a fast-moving toddler in a crowd, and dealing with the inevitable tears when the fire trucks blare their sirens, it is often more exhausting than it is fun.
This year, bypass the traffic and the heat entirely by hosting your very own Living Room Parade. It brings all the festive energy right into your air-conditioned home, and it is the absolute best way to burn off that chaotic, mid-afternoon energy right before naptime or dinner.
The Low-Prep Trick
Instead of sitting along a crowded street, your kids get to be the star performers. All you need is a festive playlist on your phone or smart speaker and a few safe, noisy items pulled straight from your kitchen cabinets.
What You Need:
-
A phone or speaker to play music
-
A couple of lightweight metal pots, pans, or metal mixing bowls
-
Wooden spoons, silicone spatulas, or plastic whisks
-
Optional: Any toy instruments you already have (tambourines, shakers, maracas), or a small American flag to wave
How to Set It Up:
-
Clear the Runway: Move any stray toys or coffee tables slightly to the side to create a clear parade route through your living room or around your kitchen island.
-
Raid the Cabinets: Flip a couple of cake pans or pots upside down on the floor and lay out a few wooden spoons.
-
Queue the Music: Search your favorite music streaming app for a upbeat playlist. Look for classic, energetic tunes like marching band music, Americana folk songs, or just fun, fast-paced children’s songs that make you want to move.
Connection Over Correction: How to Play
Hand your toddler a wooden spoon and a pot, grab one for yourself, and turn the music up. Lead the way by marching around the room, banging your drums to the beat. Encourage them to march high on their tiptoes, stomp their feet loudly, or sway from side to side.
If you have a baby who is crawling or sitting, set them up in the center of the room with a lightweight metal bowl and a silicone spatula. They will be utterly mesmerized by the clanging sounds they can make all by themselves. For tiny infants, pop them into a baby carrier, grab a small flag to wave, and let them enjoy the rhythmic bouncing as you march around the house.
Don’t worry about keeping a perfect musical rhythm or making too much noise. The beauty of the Living Room Parade is that it provides a massive, healthy outlet for heavy sensory input (stomping and banging) and gross motor movement. It channels that restless holiday energy into pure, connected fun.
Mom Tip: When the parade winds down and everyone is happily tired out, transit the high-energy music to a calm, low-key instrumental playlist. It’s the perfect environmental cue to let their little bodies know that the big parade is over, and it’s time to wind down for a snack or a restful nap.
Activity 8: Red, White, & Blue Snack Board
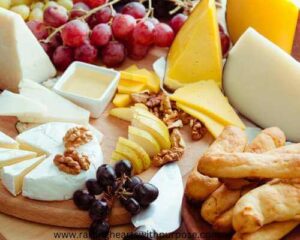
On a hot holiday afternoon, the last thing any tired mom wants to do is turn on a hot oven to bake a complicated themed dessert. Besides, traditional 4th of July frosted cupcakes or heavy pastries usually lead to an intense sugar crash right around the time you’re trying to get everyone to sleep.
This year, trade the baking stress for a fun, festive, and incredibly easy Red, White, and Blue Snack Board. It feels like a special holiday treat to a toddler, but it takes less than five minutes of assembly and is packed with wholesome, hydrating ingredients.
The Low-Prep Trick
Instead of spending hours in the kitchen, we are leaning into a simple, pick-and-mix bento-style framework. By gathering a handful of naturally red, white, and blue finger foods and arranging them together on a single platter, you create an eye-catching feast that encourages independent eating with zero actual cooking required.
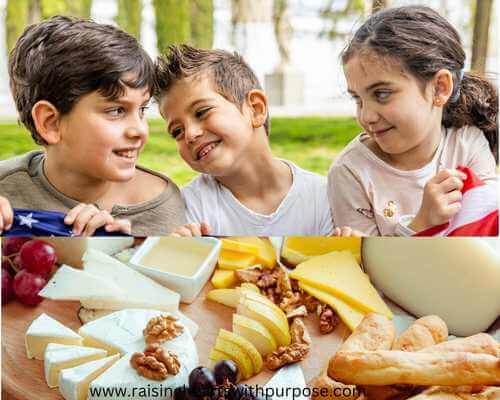
You may want to refer to one of our series; 7 Easy, No-Cook 4th of July Snack Tray For Toddlers (Healthy & Dye-Free)
What You Need:
-
The Reds: Fresh strawberries (sliced or quartered), raspberries, or watermelon cubes.
-
The Whites: Banana slices, peeled apple pieces, mini rice cakes, string cheese coins, or freeze-dried yogurt melts.
-
The Blues: Fresh blueberries (be sure to cut or smash them for babies and younger toddlers to prevent choking), or blackberries.
-
The Vessel: A large wooden cutting board, a rimmed baking sheet, or a muffin tin for a fun pick-and-mix compartment feel.
How to Set It Up:
-
Wash and Prep: Give your fruit a quick rinse. Slice the strawberries and bananas into safe, bite-sized finger foods for your little ones. If you are serving under-twos, remember to gently smash your blueberries between your fingers before plating them.
-
Arrange the Board: You don’t need to create a flawless, geometrically perfect American flag out of fruit. Instead, just place your items in casual, alternating color piles across the board. Put a pile of red strawberries next to a pile of white yogurt melts, followed by a handful of blueberries.
-
Serve It Low: Place the board right on the coffee table over a washable blanket, or bring it outside onto a picnic towel in the shade.
Connection Over Correction: How to Play
There is something incredibly magical to a toddler about eating off a communal platter instead of their standard highchair plate. Announce it as a 4th of July Picnic and let them dive in.
Because everything on the board is safe and wholesome, you can step back and give them total autonomy over what they choose to eat. This low-pressure environment is actually a fantastic trick for picky eaters seeing the vibrant colors grouped together makes the food look exciting, and having the freedom to pick and mix their own bites builds major confidence.
As they eat, enjoy the slow pace. Talk about the different flavors: “Is the strawberry sweet? Is the blueberry juicy?” It’s a wonderful, quiet moment of connection in the middle of a busy holiday.
Mom Tip: If you have an infant who is just starting solids, you can easily adapt this board for them. Simply blend a few of those red strawberries and blue berries into a quick, whole-food protein smoothie using Greek yogurt as your white base, and let them sip it from a straw cup while their older siblings graze on the finger foods.
Activity 9: Glow-Stick Dance Party (The Alternate Fireworks)
If you have babies or toddlers, the traditional finale of the 4th of July can feel like a logistical nightmare. Real fireworks don’t even start until well past 9:00 or 10:00 PM when it’s finally dark enough outside. For a tiny human, staying up that late almost guarantees an overtired, tearful meltdown, followed by a disrupted sleep schedule that you’ll be paying for over the next three days.
Add in the booming, unpredictable noise that often terrifies young children, and a late-night outing quickly loses its charm.
This year, give yourself total permission to skip the midnight chaos. Instead, bring the sparkling light show inside on your own terms with a Glow-Stick Dance Party. It gives your kids that magical light in the dark holiday experience, but it happens entirely before their standard bedtime.
The Low-Prep Trick
Instead of waiting for the sun to go down and explosions to start, we are creating a safe, silent, and indoor firework display using cheap dollar-store glow sticks. By darkening a bedroom or bathroom just 30 minutes before bed, you can simulate the excitement of fireworks in a totally controlled, sensory-friendly environment.
What You Need:
-
A pack of multi-colored glow sticks, glow bracelets, or glow necklaces (readily available at dollar stores or the target bullseye playground)
-
A bedroom or living room with blackout curtains, or a windowless bathroom
-
A fun, upbeat music playlist
How to Set It Up:
-
Crack and Glow: Right before your bedtime routine begins, grab your pack of glow sticks and crack them to activate the colors.
-
Dim the Lights: Head into your designated room and pull the shades shut or turn off the overhead lights so it’s safely dim, but not pitch black.
-
Queue the Playlist: Turn on some fun music. You can use festive songs, or just your toddler’s favorite high-energy dance tracks.
Connection Over Correction: How to Play
Hand the glowing sticks to your toddler and let them wave them through the air. In the dim room, the trails of light look just like colorful fireworks streaking across the sky!
Show them how to move their arms fast to make rapid “sparkler” trails, or jump up and down to create “booming” firework bursts. If you have glow bracelets, you can loop them around your toddler’s wrists or ankles so they glow with every step they take.
For younger babies, simply sitting on the floor holding a glowing tube (always securely capped) and watching the soft colored light shift across the room is deeply mesmerizing. It is a brilliant, low-stimulation way to let them experience the holiday colors without the frightening sensory overload of real pyrotechnics.
Safety Note for Tiny Humans: Always supervise your little ones closely with glow sticks. Make sure they don’t chew on the plastic tubes or bend them aggressively to the point of breaking. For very young babies who put everything in their mouths, you can safely drop the activated glow sticks inside an empty, clear plastic water bottle and screw the cap on tightly. It creates a completely sealed, chew-safe glowing sensory baton!
Mom Tip: The best part of the Glow-Stick Dance Party? When the music stops, you are already steps away from their crib or bed. You haven’t had to pack up a stroller, fight stadium traffic, or carry a screaming toddler through a dark parking lot. They get to go to sleep right on time, and you get to spend the rest of your evening relaxing on the couch in peace.
Quick Survival Tips for Exhausted Moms (The Mindset Shift)
Before you head off to prep your sensory bins or crack open those glow sticks, let’s take a collective deep breath and talk about the most important part of any holiday with tiny humans: your mindset.
As moms, we carry an invisible backpack filled with expectations. We want the matching outfits, the perfect photos, and the core memories. But when you are running on broken sleep and managing the big, unpredictable emotions of babies and toddlers, trying to force a perfect holiday will only leave you feeling depleted.
Here are three gentle survival tips to help you protect your peace, lower your stress, and actually enjoy the 4th of July this year.
1. Connection Over Correction
When you hand your toddler a paintbrush or set up a sensory bin, make a conscious decision to step back and drop the instructions. If their toilet paper roll fireworks look like giant, mud-colored blobs instead of neat starbursts, let them. If they want to just dump all the red and blue spaghetti onto their heads instead of sorting it with tongs, laugh with them.
The magic of these activities isn’t in a final product that you can show off on social media. The magic is in the process. When we stop correcting how our kids play and start focusing on the shared eye contact, the silly giggles, and the unhurried time together, the pressure melts away. Your kids won’t remember if the craft was perfect, but they will remember the feeling of a regulated, happy mom playing alongside them.
2. Protect the Nap (And Drown Out the Noise)
There is nothing worse than finally getting your baby down for a much-needed holiday nap, only for a neighbor to set off an early firecracker down the street ten minutes later. Early afternoon fireworks are a frustrating reality of the 4th of July, but you can build a sensory defense system for your nursery.
Don’t hesitate to lean heavily on your white noise app or portable sound machine today. Set the volume a little bit louder than usual, and place the machine on the side of the room closest to the window or outer wall to act as a sound barrier. If your little one is an incredibly sensitive sleeper, you can even double up by running a box fan in the room alongside their standard sound machine. Protecting their sleep schedule means protecting your evening sanity.
3. Permission to Stay Home
If you take away nothing else from this post, remember this: you have absolute permission to stay home.
You do not have to pack up the heavy stroller, battle a crowded parking lot, or sit on a scorching patch of grass just to prove you celebrated the holiday. Staying home in the glorious air conditioning, making a simple fruit board, and splashing in a basic plastic baby pool in the backyard is not missing out. It is a beautiful, intentional choice to prioritize your family’s well-being.
Years from now, your kids won’t remember the community events they skipped when they were two years old. They will look back at photos of themselves covered in puffy paint, eating watermelon on the living room floor, and think of the 4th of July as the coziest, happiest day of the summer. Give yourself grace, mama. You are doing a wonderful job.