It is officially the countdown to Memorial Day weekend, and if your social media feed looks anything like mine, it’s probably flooded with families packing up for expensive beach trips, booking flights, or heading out to crowded campgrounds.
If you are sitting at home with absolutely zero travel plans, it is incredibly easy for that wave of parent guilt to creep in. You might be wondering if you are letting your kids down by staying put.
But let’s be entirely honest for a second: packing up suitcases, loading toddlers into a packed car, fighting holiday traffic, and paying peak-season prices is exhausting. Sometimes, a long holiday weekend is best spent right where you are minus the stress, and minus the empty wallet.
The truth is, your kids don’t need an expensive hotel room to make core memories this weekend. They just want to have fun with you, they just need you, oh yes i mean you, they need that face, eyes looking straight into theirs, admiring them and that thankful heart of yours.
If you want to give your family an unforgettable, festive long weekend without ever leaving your neighborhood, you are in the right place. From backyard transformations to clever indoor boredom-busters, here are 8 cheap, easy, and completely last-minute Memorial Day weekend activities you can pull off at home with items you likely already have in your cupboards.
1. The Neighborhood Bike & Stroller Parade

There is something so nostalgic and magical about a neighborhood parade, and the best part is that you don’t need an official city permit to host one. A DIY bike and stroller parade is the ultimate way to kick off the long weekend, get the kids outside burning off some energy, and bring a little festive cheer right to your front door.
The Idea
The concept is beautifully simple: transform your kids’ everyday wheels into patriotic masterpieces using cheap party supplies, and then hit the pavement for a festive lap around the block. Whether your child rides a bicycle, a scooter, a tricycle, or is still cruising in a stroller, they can get in on the fun.
Before you start, make a quick trip to the dollar store or dig through your party bin for supplies like:
-
Red, white, and blue crepe paper streamers
-
Patriotic balloons or plastic star garlands
-
Mini American flags (to tape to handlebars)
-
Standard painter’s tape (which holds well but won’t ruin the paint on their bikes!)
Spend Saturday morning out in the driveway letting the kids weave streamers through their wheel spokes, wrap their handlebars, and tape balloons to their baskets. Not only does this keep them focused and creative for an hour, but it also builds massive anticipation for the main event. Once the decorating is done, put on some upbeat music and let them proudly parade down the sidewalk.
Parent Tip: Don’t do this in isolation, Send a quick text to one or two neighborhood parents or post in your local community group a day before. Invite them to have their kids decorate their bikes too, and pick a specific time (like 10:00 AM) to meet at the end of the cul-de-sac. Having a small crew of kids riding together makes it feel like a real community event, and the parents can walk along behind them sipping iced coffee and chatting. It’s an instant, free playdate.
2. The Backyard Campout (or Epic Living Room Fort)
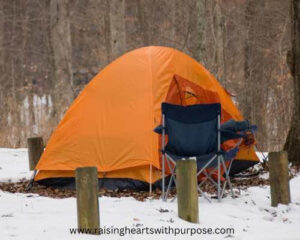
You don’t need to fight for a crowded campsite reservation, with zero privacy and overwhelmed amenities or drive three hours into the woods to give your kids an authentic camping adventure. In fact, camping at home is often ten times better because you have your privacy, am emphasizing on it because i love my privacy, your clean flushing toilet is always just a few steps away. This activity is all about breaking the normal household routine and making the ordinary feel extraordinary.
The Idea
The goal here is to change where you sleep and how you spend your evening. If the weather is beautiful and clear, head outside to pitch a tent on the lawn. Toss in some air mattresses, sleeping bags, and a mountain of pillows to make it cozy.
But what if the weather doesn’t cooperate, or you live in an area where the mosquitoes are already out in full force? Don’t let that stop you! Move the adventure indoors and build an epic living room fort. Drag out the kitchen chairs, strip the cushions off the couch, and use your heaviest blankets to create a massive indoor cavern. Use chip clips, clothespins, or heavy books to secure the blankets so the roof doesn’t cave in.
The Fun Factor
To make this feel like a true vacation and not just a regular night at home, you have to lean into the camp rules:
-
The Flashlight Rule: Turn off all the overhead house lights. Once the sun goes down, the family can only navigate using flashlights, headlamps, or glow sticks.
-
Dinner on the Ground: Skip the dining room table. Serve dinner directly inside the tent or fort. Keep it simple with camp food like hot dogs, finger foods, or a DIY snack board.
-
Flashlight Storytime: Snuggle up together and tell stories. You can read their favorite books by flashlight, share funny memories from when they were babies, or try your hand at making up a spooky (but kid-friendly) shadow-puppet tale on the tent wall.
Parent Tip: You cannot have a campout without s’mores! If you are outside, you can use a fire pit. If you are indoors, you can easily make fudge s’mores in the microwave or oven broiler. Alternatively, make a S’mores Trail Mix by tossing Golden Grahams cereal, mini marshmallows, and M&M’s into a bowl. It gives them all the classic flavors with absolutely zero sticky mess inside your blankets.
3. Red, White, and Blue Kitchen Chemistry
Late May weather can be completely unpredictable. If you find yourself facing a sudden thunderstorm, or if the afternoon heat index spikes so high that it’s simply too hot to be outside, you need a secret weapon hidden up your sleeve. Enter Kitchen Chemistry. This activity channels your inner cool-teacher by turning everyday baking ingredients into a mesmerizing, patriotic science lab that keeps kids intensely focused and quiet.
The Idea
The goal here is sensory-heavy, hands-on play using simple pantry staples. Kids are naturally obsessed with cause-and-effect experiments, and when you add a festive red, white, and blue twist, it feels like an exclusive holiday event rather than just a rainy-day backup plan.
Here are two incredibly easy ways to set up your patriotic kitchen lab:
-
The Patriotic Fizzy Volcanoes: Grab a large baking sheet, a casserole dish, or a shallow plastic bin to catch the mess. Set out a few small cups or small bowls and fill the bottom of each with a generous scoop of standard baking soda (the white). Next, fill two separate cups with white distilled vinegar. Add a few drops of red food coloring to one vinegar cup, and blue food coloring to the other. Hand your kids a plastic medicine dropper, a syringe (like the ones that come with children’s Tylenol), or even just a small teaspoon. Let them drop the colored vinegar onto the baking soda and watch in awe as it instantly creates a bubbling, fizzing, patriotic eruption.
-
Red, White, and Blue Sensory Rice: If you want an activity that is completely dry and has zero fizzing mess, make a quick sensory bin. To dye white rice, simply toss 2 cups of uncooked rice into a Ziploc bag with a teaspoon of white vinegar and a few drops of food coloring. Shake it up until the rice is coated, spread it out on a paper towel for 10 minutes to dry, and repeat for the other color. Dump the red and blue rice into a bin alongside plain white rice. Give them scoops, funnels, and red plastic solo cups to pour, mix, and measure.
The Fun Factor
To make this feel like a true science lab, lean into the roleplay. Call your kids Professor [Their Name], give them a pair of sunglasses to wear as safety goggles, and let them experiment freely. Challenge them to see what happens when the bubbling red foam mixes with the bubbling blue foam (spoiler: they’ll create a cool, fizzy purple).
Parent Tip: To make cleanup absolutely effortless, do not do this directly on your kitchen island or table. Instead, take a cheap plastic tablecloth from the dollar store (or even a garbage bag sliced open flat) and tape it down to your floor or table using painter’s tape. Set the baking sheets or sensory bins right on top of it. When the kids are completely done playing, you can simply gather up the corners of the plastic tablecloth and throw the entire mess away in one single swoop—leaving your surfaces perfectly clean.
4. Host a DIY Splash Zone
When the late May afternoon heat kicks in, kids naturally start begging to go to the pool. But holiday weekend community pools are notoriously packed, loud, and stressful for parents who have to play lifeguard every single second. Instead of packing up a massive heavy bag of towels and sunscreen just to fight for a lounge chair, you can bring the water park experience right to your own backyard for next to nothing.
The Idea
A DIY Splash Zone isn’t about having an expensive in-ground pool; it’s about setting up multiple water stations around the yard to create an obstacle course of cooling fun. Kids don’t need deep water to stay entertained, they just want the sensory thrill of getting splashed.
Here is how you can set up a high-energy splash zone using things you probably already own, mixed with a few cheap dollar-store finds:
-
The Classic Sprinkler Twist: Pull out your garden sprinkler, but don’t just turn it on and walk away. Place it underneath a patio table or a plastic play set. This creates a water tunnel that the kids have to crawl through.
-
Plastic Bin Sensory Stations: Gather a few large plastic storage bins or laundry baskets and fill them to the brim with water. Toss in kitchen ladles, measuring cups, plastic tupper ware, and empty water bottles. You will be amazed at how a toddler or preschooler will happily sit and pour water from container to container for an hour straight.
-
The Toy Car Wash: Bring their outdoor ride-on toys, plastic trucks, or Barbies out onto the lawn. Give them a sponge, a bucket of baby-tear-free soapy water, and a hose, and put them to work running a neighborhood car wash.
-
Water Balloon Alternative: Instead of spending an hour tying tiny plastic water balloons (only to pick up shredded plastic pieces from the grass later), buy a few cheap car-washing sponges from the dollar store. Cut them into strips and tie them together with a rubber band to make reusable sponge bombs. Dunk them in a bucket of water, and they are perfect for throwing at each other without the pain or the clean-up.
The Fun Factor
Turn up the heat on the fun by setting a timer and challenging the kids to an obstacle course. They have to jump over the sprinkler, dunk their sponge bomb, wash a toy truck, and run back through the water tunnel.
Parent Tip: The secret to making this a relaxing afternoon for you is zoning. Set up your lawn chair completely outside the splash radius, pour yourself an iced tea, and put on your favorite podcast. Because water play keeps kids intensely focused, this is your golden window to actually sit back and relax while still being close enough to supervise. Just don’t forget to lay a strict no towels inside the house rule before the fun begins.
5. Drive-In Movie Night (Living Room Edition)
By the time Sunday or Monday evening of a long holiday weekend rolls around, everyone is usually a bit exhausted. The kids are overtired from being outside, and you are likely all out of parenting energy. Instead of just turning on the TV and letting everyone zone out on their tablets, you can turn a lazy movie night into a highly memorable, creative event: a DIY indoor drive-in movie theater.
The Idea
The magic of this activity happens in two distinct phases: the craft phase and the show phase. It keeps the kids busy for an hour before the movie even starts, giving you a quiet block of time to prep dinner or just sit down.
-
Phase 1: Build the Cars. Raid your garage, recycling bin, or ask a local grocery store for a few large, empty cardboard boxes—one for each child. The box needs to be big enough for your child to sit inside comfortably with their legs crossed. Hand them markers, crayons, stickers, and construction paper. Let them design their dream holiday ride. They can draw wheels on the sides, tape on paper-plate headlights, create a paper license plate, and even draw a detailed dashboard on the inside.
-
Phase 2: Park and Watch. Once the cars are fully customized and dried, line them up side-by-side in the living room facing the TV. Make the interiors extra cozy by lining the bottom of the boxes with a soft blanket or a couple of bed pillows.
The Fun Factor
To make it feel like an authentic, old-school drive-in theater, you have to lean into the theme.
Print out or sketch quick little tickets that you hand to the kids. When it’s showtime, act as the theater usher, collect their tickets, and guide them to their parking spot in the living room.
Next, set up a concession stand at the kitchen counter. Instead of just handing them a bowl of popcorn, serve it in individual paper lunch bags or small plastic cups. You can even offer a concession menu where they can choose their snacks—like a juice box, a small box of raisins, or a few pretzel sticks. Once everyone is parked and buckled into their box cars, dim the living room lights completely, press play on a favorite family movie, and enjoy the silence.
Parent Tip: If your kids are toddlers or preschoolers who have a hard time sitting still in one spot for an hour and a half, the cardboard box car is an absolute lifesaver. Because the box creates a clear, physical boundary, it naturally encourages them to stay anchored in one spot rather than wandering around the room or climbing on the furniture. It keeps them contained, cozy, and focused on the screen, giving you a guaranteed block of uninterrupted relaxation.
6. The Ultimate Backyard Treasure Hunt
If your kids are starting to get restless and the dreaded phrase “I’m bored” is echoing through the house, it is time to pivot their energy into a high-focus mission. A backyard treasure hunt is one of the absolute best tools in a parent’s toolkit because it combines physical exercise with critical thinking. It instantly burns off excess energy, stops sibling squabbles, and buys you a solid block of quiet time while they track down clues.
The beauty of a treasure hunt is that it sounds incredibly elaborate to a child, but it only takes you about ten minutes of prep time. You don’t need to buy anything new, you just need a piece of paper, a pen, and a few household items to use as the loot.
-
Create the Map: Grab a blank piece of paper and draw a rough, simple sketch of your backyard (or your living room if it’s raining). Don’t worry about being an artist. Just draw simple shapes to represent major landmarks: a rectangle for the patio table, a circle for the big tree, a square for the sandbox, or a triangle for the grill. Put a big, bold “X” where the treasure is hidden.
-
For Younger Kids (Picture Clues): If you have toddlers or preschoolers who can’t read a map yet, use visual or verbal clues instead. Hand them a physical item like a single plastic outdoor toy and tell them, The next clue is hidden right next to the real-life version of this.
-
For Older Kids (Riddles & Challenges): Make them work for it. Write down quick, simple riddles on scraps of paper and place them in a sequence. For example, Clue #1 says: I have leaves but I’m not a book, go check my trunk and take a look (The Tree). When they run to the tree, they find Clue #2 waiting for them.
The Fun Factor
To build massive excitement, lean heavily into the storytelling. Tell them that a legendary pirate (or a patriotic explorer) hid a secret stash in the yard, and only the smartest kids can unlock the map.
For the actual treasure at the end, keep it simple. You can hide a small bowl of festive treats (like red, white, and blue M&M’s), a couple of cheap bubble wands from the dollar store, or even just their favorite stuffed animals dressed up in funny hats. The reward doesn’t need to be expensive; to a kid, the thrill is entirely in the thrill of the hunt.
Parent Tip: If you want this activity to last twice as long, do a Reverse Treasure Hunt once they finish the first one. Tell the kids that it is now their turn to hide the treasure from you. Give them the map, send them into the yard to hide an object, and have them draw an X where they put it. Kids absolutely love the power dynamic of watching their parents stumble around the yard trying to solve their clues, and it doubles your quiet time on the patio.
7. Festive No-Bake Sweet Treats

Nothing says holiday weekend quite like a special sweet treat, but the last thing any parent wants to do on a warm May afternoon is turn on a hot oven and bake. Between the prep work, the baking time, and the inevitable mountain of dirty mixing bowls, baking with kids can quickly spiral from a fun family activity into a stressful mess. That is why no-bake treats are an absolute sanity-saver. They give your kids all the joy of creating their own dessert with zero cooking time and minimal cleanup.
The Idea
The concept here is a DIY Patriotic Sundae and Yogurt Bar. Instead of assembling a complicated dessert yourself, you are going to set up a festive topping station and let the kids become the chefs. It doubles as a fun afternoon activity and a delicious snack.
Head to the grocery store and grab a few simple, budget-friendly staples:
-
The Base: A tub of standard vanilla ice cream (or vanilla Greek yogurt if you want a healthier, afternoon-snack alternative).
-
The Red: A pint of fresh strawberries (sliced up) or red raspberries.
-
The Blue: A pint of fresh blueberries.
-
The Festive Crunch: Whipped cream, red, white, and blue sprinkles, or crushed graham crackers.
Set everything out on the kitchen counter or a picnic table outside in individual bowls. Give each child a cup or a clear plastic bowl so they can see the colorful layers they are about to build.
The Fun Factor
Turn the snack into a creative challenge. Tell the kids they are competing in a Patriotic Dessert Design Contest. Challenge them to build beautiful red, white, and blue layers, or to see who can make the most creative pattern on top of their ice cream.
For younger kids, this is a fantastic, sneaky way to practice pattern-making and fine motor skills as they carefully place individual blueberries and strawberry slices. For older kids, let them go wild building a massive All-American masterpiece complete with a towering mountain of whipped cream and a heavy dusting of sprinkles.
Parent Tip: To prevent the topping bar from turning into a chaotic free-for-all, use a standard muffin tin. Instead of cluttering your counter with five different bowls that can easily be knocked over by small hands, dump each topping into a different cup of a single 12-count muffin tin. Put the strawberries in one cup, blueberries in another, sprinkles in a third, and so on. It keeps all the ingredients perfectly contained in one sturdy, un-tippable tray, and when the kids are done eating, you only have one single dish to rinse off in the sink.
8. The Ultimate Sidewalk Chalk Mural
When the indoor walls start closing in and everyone needs a breath of fresh air, reach for that giant bucket of sidewalk chalk. Chalk is one of the cheapest, most underrated parenting tools on the planet. It costs just a few dollars, keeps kids grounded in one spot outside for hours, and best of all, the clean-up is completely handled by nature the next time it rains. Instead of just letting them scribble random lines, you can turn your driveway into an expansive, festive art gallery.
The Idea
The goal here is scale. Move past standard doodling and challenge the kids to cover the entire driveway or a massive section of the sidewalk with a collaborative holiday mural.
Here are two highly engaging ways to set up this outdoor art session:
-
The Giant Body-Tracing Masterpiece: This is an absolute crowd pleaser for younger kids. Have your children lie down flat on the pavement in funny poses waving their arms, jumping, or striking a superhero pose. Use a thick piece of chalk to trace their entire body outline. Once they stand up, hand them the bucket and challenge them to color themselves in. Tell them to design their own festive, patriotic outfits, drawing on red and white striped shirts, blue hats, or giant stars.
-
The Stained-Glass Driveway: If you have slightly older kids, use the painter’s tape trick. Tape down a large grid or a geometric star pattern directly onto the concrete using standard painter’s tape or masking tape. Let the kids color in each individual section with a different bright shade of chalk. Once they are done coloring, peel the tape away to reveal perfectly crisp, sharp, professional-looking white lines between the colors. It looks incredibly striking and feels like a true piece of public art.
The Fun Factor
Once the mural is complete, turn it into an interactive game zone to burn off that final burst of pre-bedtime energy. Use the chalk to draw a winding agility track down the driveway. Draw a long zigzag line they have to balance-walk on, giant lily pads they have to hop between, a classic hopscotch grid, and a big bullseye target at the end where they have to stomp to finish. Time them with your phone to see who can complete the course the fastest.
Parent Tip: Sidewalk chalk is famous for leaving kids with dusty, colorful hands that immediately end up wiped on their clothes or your clean furniture. To save your sanity, bring a damp washcloth or a container of baby wipes right out to the driveway with you. Better yet, if your kids hate the dusty texture on their fingers, dip the sticks of chalk into a small bucket of water before writing. Wet chalk glides onto concrete as smoothly as paint, the colors show up ten times brighter, and it completely eliminates that dry, dusty chalk residue on their hands.
Creating Memories That Last Long Past the Weekend
At the end of the day, it is incredibly easy to fall into the trap of thinking that a great childhood requires expensive travel, booked out resorts, or perfectly curated holiday vacations. But if you take a look back at your own favorite childhood memories, odds are you don’t remember the price tag of the hotel room you remember the feeling of absolute fun, the laughter, and the uninterrupted time you spent with the people who loved you.
Your kids don’t care about a luxury itinerary. They care about the morning you let them turn cardboard boxes into race cars in the living room, the afternoon they splashed wildly in the backyard, and the night they got to eat s’mores inside a giant blanket fort.
By choosing to stay home this Memorial Day weekend, you aren’t missing out. You are giving your family the greatest gift of all: a relaxed, stress-free parent who is fully present and ready to make some core memories right in your own backyard.
So grab that bucket of chalk, pull out the baking soda, pop some popcorn, and enjoy a beautiful, budget-friendly long weekend together. You’ve got this
Now it’s your turn: Which of these easy staycation ideas are you going to try with your kids this weekend? Do you have a favorite at-home activity that didn’t make the list? Let me know in the comments below I’d love to hear your ideas.
You may also love to read on the post 5 Low-preparation memorial day water play ideas